Tuesday, February 20, 2024

TOMA Phase One: Fine Tuning Operations


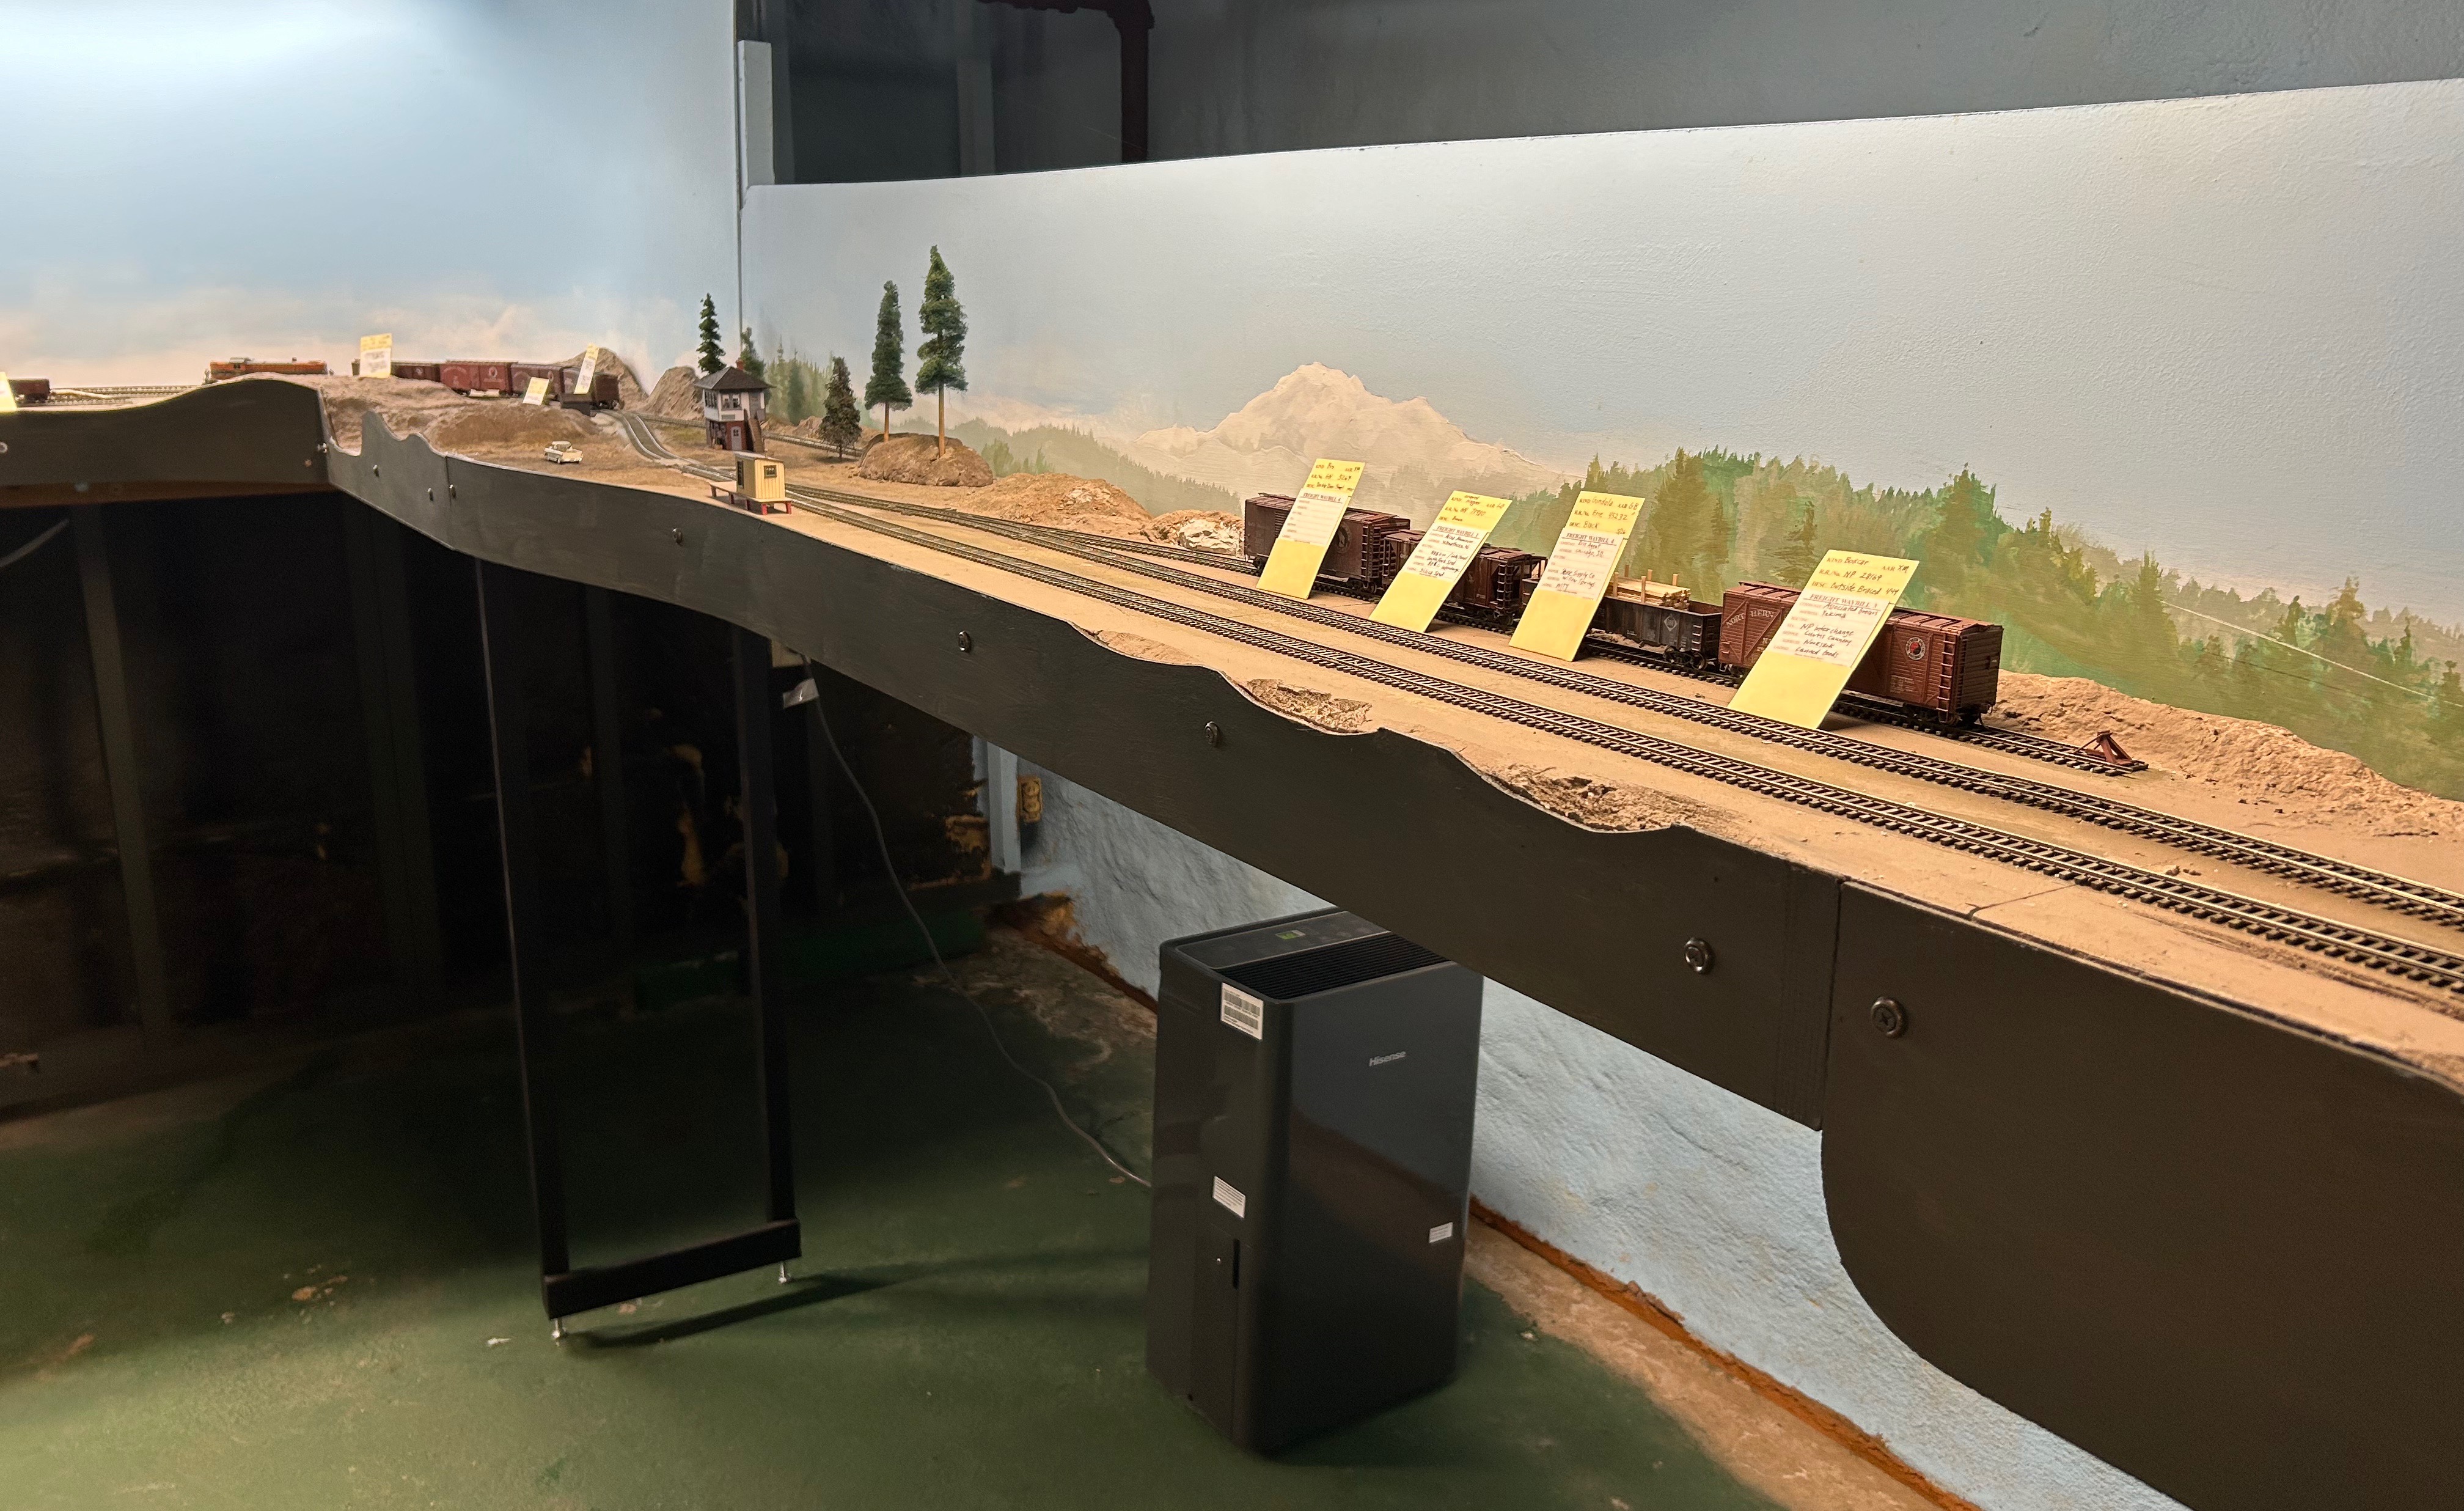
East Branch fascia up and painted
Over the past week or two, I have been working on a clinic about planning the railroad after moving. In doing so, I reminded myself that "presentation" and flexible operations are both goals that I am striving for. Yesterday, I wrapped up adding fascia to East Branch, the sceniced staging. Fascia is a part of what I refer to as presentation as it "frames" the modeled railroad. I used some 1/8" hardboard backdrop scraps that I had on hand, then cut them, screwed them in place, and painted them my standard SW "Andiron" color. I still have some Sculptamold terrain building to do to match the dips cut into the fascia as well as installing a plug port to finalize the fascia install. 

However, with East Branch more visually tied to Nooksack, I felt the need to consider fine-tuning my operations plans; just how is the East Branch going to work? In an earlier post from last fall, I had as a starting point a bulleted list. Much more recently I have "run trains" a few times to test what might work and decided that some kind of "sequence operations" makes sense, but struggled with organizing how to sort cars while being aware of industry needs without using car cards. Last week, Tony Thompson on his modeling the SP blog referenced a link to a film from the 1950s. Then, yesterday, the same film was linked in the NMRA turntable. By now I have watched the film, "Assembling A Freight Train," several times, enjoying and learning from it on several levels (atmosphere, realism, prototype operations). 


The film is a great resource for modelers of the transition era ranging from color images of rolling stock to an in-depth explanation of the nuances and procedures of making up a train. I was particularly struck by how I might solve my dilemma. First of all, what is all the fuss about; what dilemma do I speak of? Unlike many model railroaders, I am considerably more interested in the research of what is shipped or where it is shipped from than researching or matching 100% accuracy of the model of the car in which it is shipped. How do I implement going down that rabbit hole on my railroad? Also, somewhat related, is the diversity and variety that Byron Henderson speaks of in his online article, Ops Challenge (and Fun!) on a Small Layout. He suggests, "including both a classification yard as well as the more traditional role of pulling and spotting cars from sidings." My dilemma is how to organize the classifying. I don't want just random sorting. 

The film, by going through the actual process provides one approach. While during switching, the operator is taking on the role of engineer and conductor. On the other hand, during classification, the operator is taking on the roles of the industry clerks and switch engine crew. In the role of industry clerk, the operator employs simplified car cards and waybills to determine contents, sources, and destinations of the cars while working as the switch crew sorts and blocks the train. 

So, while I had not originally planned on using car cards and waybills on this first phase, I unpacked the ones from the Meadville attic layout. In my current plan, they will be used to make up trains in the staging yards, including East Branch. Of the rolling stock I have on the layout now, I have car cards for all but three of the cars. On the other hand, I will need to make up pretty much all new four-cycle waybills; the four industries at Willow Springs are now at Nooksack. I have an industry list chart started and pages of notes gathered over the years. The cannery planned at Nooksack and based on the one in Everson will be one of the largest industries in this first phase as well as the future whole basement 4th Subdivision. Two of the other industries here at Nooksack are very typical for a 1950s rail served town: team track and fuel/oil dealer. I will also have the NP interchange, as well as the (for now unmodeled) Ferndale's GN mainline interchange and Chikamin connections as destinations with their associated industries. Taking on the role of industry clerk, I can make up some four-cycle waybills to be used here on TOMA phase one: Nooksack and staging. I still haven't made up my mind whether to include a bill box here on the fascia for the industry clerk or at the agent/dispatcher desk. Before deciding where the cards and waybills will be located, I need to write them up!

Sunday, February 11, 2024

Scenery From the Ground Up -- Part 2

Having decided to keep the signal tower in its location at East Branch and the NP interchange, I have continued with the first layer of scenery around it. I started by modeling a wooden grade crossing for the driveway that accesses the tower. Then I created a gravel road as the driveway. Today, I expanded the sceniced area with more of the original grout ground cover. 

Knowing that I was going to create a gravel road, I decided on a rustic wooden grade crossing. I chose sixteen feet as an appropriate width for a one lane drive, particularly as that is a typical length of wooden planks. I had 1/8" X 1/8" and 1/32" X 1/8" strip wood on hand, and those sizes worked well with my flex track. Those sizes roughly represent 12" X 12" and 3" X 12" boards in HO scale. I cut them to length on my chopper and stained them with grimy black acrylic paint, thinned with 70% isopropyl alcohol. After they had dried I glued the thinner planks to the plastic ties with CA, and the two thicker boards were glued to the painted foam with Elmer's Glue-All. 


I am very happy how the grade crossing came together. The 1/32" board along the outer edge of the rail is super glued to the spike heads, angled up from the ties and butted up to the rail. Moving outward from the rail, the next 1/32" thick piece is superglued directly to the top of the ties. The outer board is one of the 1/8" square pieces, glued directly to the foam. The same pattern is repeated on the other side, outside the rail. Four of the thinner planks are super glued directly to the ties, between the spike heads, leaving room for the wheel flanges. This combination appears to work really well, leaving room for the rolling stock to move through the crossing without problems. 

The next step was to attempt to model a gravel road with sanded grout. I used the 09 Natural Gray color of Polyblend Plus and Woodland Scenics' fine gray ballast blended together while still dry. Following the same method of painting on thinned white glue, tapping a spoon of the grout mixture over the glue, and then eyedroppering alcohol as a wetting agent followed by dripping on scenic cement described in the earlier post I created a somewhat soupy mess. Tapping on a bit more of the grout mix and some straight ballast on the wettest parts firmed up the road. While it was drying I used a sacrificial HO vehicle to form some tread marks (perhaps a little too deep) and then let it dry. A final step after the roadway had dried was to sand the crossing planks that had been stained by the scenic cement with 320 grit sandpaper. 


Earlier today, I expanded the area with the first layer of scenery to the east of the gravel drive and to the east along the back berm. A repeat of the same process with more of the original mix of both colors of sanded grout and some filtered sand from the tube sand. Yes, it is rather barren looking without additional greenery and details. That said, I am really liking the sanded grout as a first layer. It provides some texture and color that is closer to scale than the ground goop I have used in the past. I also like the wooden grade crossing, which fortuitously came together easily as a mini-scratchbuilding project.