Friday, December 29, 2023

A Signal Tower For East Branch -- Part 2

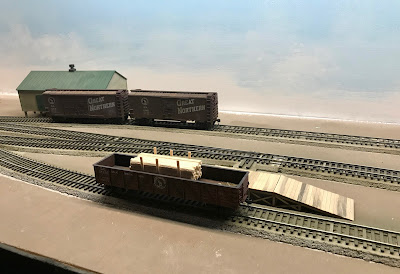
Workbench on Christmas Eve

Between the last post and Christmas Eve I made some progress with the Atlas switch tower. The tools, materials, and status of the tower are seen in the photo of my workbench. To get to this point during the buildup towards the holiday, I did manage to spend a few minutes on the tower on a number of different days. Since things had to dry and this was my only project, that schedule worked out fine. I will use a bullet list format with each bullet point representing a different day to document the progress.

  • I scrubbed the plastic walls, base, and roof with 70% isopropyl alcohol using a toothbrush. After the alcohol dried, I painted the edges of the base with my standard "earth brown" latex paint. 
  • I took the second floor walls out to the garage to paint with 2X Ultra Cover "flat gray" spray primer. As it was in the 30s, I brought the wall sections back into the basement to fully dry after spraying both sides of the walls. I lightly sponged a red and brown craft paint onto the bricks of the first floor.  
  • I applied a control coat of Vallejo Wash "dark gray" to the brick walls of the first floor.
  • Using Vallejo 70.992 Model Air "neutral gray," I painted the first coat onto the windows and doors of both the first and second floors of the tower. After measuring the thickness of the blue plastic door with calipers, I added .040 X .080 styrene strip to the top and base of the scrap box door in order to match the opening on the first floor wall. 
Today, as I write this a few days after Christmas, I returned to the tower revamp, but I will wait until I have made even more progress to discuss it in my next post. 


Monday, December 18, 2023

A Signal Tower For East Branch

At an in-person meet of my "new" NMRA division a week ago, I "won" a couple of somewhat dilapidated HO scale buildings as a raffle prize. One of them was an Atlas signal tower with a missing door and a loose wall. I decided that it would be a good project to get me out of a modeling funk. Adding a light and some interior details along with some painting practice might allow me to work towards a reasonable stand-in without the stress of underachieving with my self-imposed expectations on an expensive kit.

Possible location between the NP Interchange and 4th Subdivision mainline

By adding this structure here, I can also complete a first layer of scenery in the neighboring nearby couple of feet of terrain. These two projects should get me going again. Nothing too challenging with them, but I can get back in practice and hopefully see some progress. 

Atlas signal tower, partially disassembled

While it is not even close to a Great Northern prototype buiding, I have decided that it is a relic of the Bellingham and Northern Railroad that the GN took over. I found a Woodland Scenics Just Plug light in a parts drawer. As I mentioned earlier I will create some kind of interior for the second floor. The paint scheme will be the GN dark and light grey. The dark grey for the doors and window frames will help disguise the oversize window mullions, a trick I remember Lance Mindheim writing about somewhere. My first step was to further disassemble the building a bit more so that I can drill openings through the base and floor for the Just Plug wire. While this is not a contest level project, I hope it is just what I need to get back in the flow of actually working on the railroad!


Friday, November 3, 2023

TOMA Phase One: Modeling East Branch

The east staging now has a name, and the image above is the draft track diagram using the Copperplate font just as was used in the control panel at Nooksack. Unlike that control panel, it will just name the location and the tracks. The turnouts are manual; touch toggles will not be used here at the sceniced staging. 

East end of East Branch

Now that East Branch has a name and I have recovered from the MER convention, it is time to move forward with next steps. Two of the first steps are to paint the new track on the "run-around" extension and to paint the unpainted seam on the backdrop. The yard office, while complete enough to manipulate for positioning, needs to be completed. With those steps under way I can also finalize terrain dips and bumps, locations for roads or paths, and first layers of ground cover. To help keep me on track, I have created a next steps to-do list. 


Rails and ties painted on new runaround


Yesterday, I got started on my list by tackling the painting of the track here and the few places that new track had been installed on Nooksack. I have written about my process for painting track on this staging module before. One approach that I did a bit differently was to paint the ties soon after airbrushing the rails and ties. By the time I had cleaned the airbrush and related bottle, the ties had skimmed over, so I went ahead and painted the ties, mixing tie brown and grey craft acrylics as I went. While on a roll, I also unpacked some furnace filter trees to judge height and potential shadows on the backdrop, and after conferring with a photo pencilled in some outlines for later painting the gap in the backdrop.

Cleaning recently painted rails with wooden stick

As mentioned earlier, I painted the several patches of unpainted rail on the Nooksack module while I had the airbrush and paint out. After the acrylic paint had dried, but not really set up, I tackled cleaning the rails. I have found that the cleaned wooden sticks from my wife's favorite frozen yogurt bars are excellent for this task. Sliding them along the rails with two fingers and moderate pressure cleans the acrylic paint off easily. I am not sure how well this would work if the paint was allowed to set up overnight or if I was using oil based paint, but with freshly applied but dry acrylics it is the way to go.

This led me to consider one of the "research" sections of my next steps to-do list: track cleaning options. The frozen yogurt sticks are a keeper, but after doing some listening, reading, and YouTube viewing I am revisiting my track cleaning approach. 

I have been using abrasive foam blocks to clean the rail. I may continue to  do so after heavy scenery application, but my research suggests that abrasive blocks used regularly cause problems. They create micro scratches and, as Joe Fugate and others point out, the micro abrasions lead to excess oxidation from micro arcing of the metal wheels and powered track. One solution is polishing the railheads by burnishing with a stainless steel fender washer. I will pick up a couple of larger stainless steel washers the next time I find myself at the big box or hardware store. Many people suggest epoxying a washer wide enough to span both rails to a wooden block/handle. Obviously the track power needs to be off when this burnishing is happening! Joe Fugate again, points out a potential flaw to this approach. The fender washer polishing only hits the top of the rails without polishing the inner curve of the rounded rail, but the wheel is curved as it approaches the flange and this curve is a large part of the conductive surface. His solution is to also polish the rails with a stainless steel spoon burnishing along between the rails.

Cleaning the rail is not just for appearance and remediation after heavy scenery application, but for consistent conductivity and smooth running by removing dust and oxidation. Over the last few years, many online sources (Ron's Train's and Things is one) note the importance of using nonpolar over polar cleaners. Polar cleaners (typically containing some water) have an electrical charge and hence promote micro arcing and oxidation while nonpolar have significantly less potential for micro arcing and forming oxidation. A Joe Fugate Publisher's Musings in MRH explains this and lists some nonpolar cleaning solvents such as WD-40 Contact Cleaner, CRC Contact Cleaner and Protectant, and mineral spirits. 

Learning Points:

  1. Wooden sticks for paint removal on rails
  2. Abrasive blocks only for severe cleaning
  3. Stainless steel washer and/or spoon for polishing rail
  4. Replace polar solvent (isopropyl alcohol) with nonpolar solvent (mineral spirits) for solvent of choice for track and wheel cleaning


Thursday, October 26, 2023

Backdrop Clinic Handouts


At the recent MER convention in Altoona, I gave the most recent version of my clinic on backdrops. The clinic discusses: 

  1. A rationale for why one might use backdrops
  2. Applications and materials for creating backdrops
  3. Tips and tricks for realism with backdrops
  4. A gallery of photos of model railroads I have visited with backdrop examples
  5. A discussion of a new approach to evaluating "Background" as a part of the NMRA Achievement Program 


Due to some self-imposed technical issues I ran short on time. One of the audience members asked about access to the clinic, so I am attempting to make a downloadable version of my handout and a downloadable pdf copy of the PowerPoint slides available. This is an experiment forcing Blogger to work with Dropbox. The links should automatically download to your computer. Please use the comments to let me know if this approach works.

Link to download the handout

Link to download the PDF of PowerPoint slides

Wednesday, September 20, 2023

TOMA Phase One: Three Quick Updates

 1. Track Down and Wiring Complete on East Staging

Track down and ready to connect to the DCC bus extension

With my procedures for prepping the turnouts and soldering feeders under the rails, laying track and electrical work are interwoven rather than two sequenced steps. I have written about this process before, and it really does become easier after doing it multiple times. 

I did have one frustrating stumbling block that illustrates what I think of as the difference between remodeling and new construction. In fitting the new flex track into the glued down (well, technically latex caulked down) spur and mainline track, I had to peel up the existing ends and fit it to the new track. Track nails do not hold in the foam insulation board, and I did not want to be trying to adjust track on wet caulk. I should have worked from the existing spur track ends towards the new turnout instead of my standard procedure of working outward from the turnout. Adding to my frustration was the realization that I only had three Micro Engineering code 83 insulated rail joiners which fit nicely onto Peco turnouts, but are a bear to slip onto the Atlas flex track. Well, I almost immediately lost the third "spare" joiner into the ether as it flew off the end of a rail as I tried to force it on. While I had filed the ends of the rail, I had not made sure to have enough joiners on hand. I ultimately got the track installed with the last two insulated joiners. Must. Order. More.

The next day, the notion that "model railroading is fun" actually lived up to its reputation as the DCC bus extension, feeder drop connections, and Tam Valley Frog Juicer all wired up smoothly even though I was working under the layout. Having the right tools and materials on hand and having experience using them certainly makes things go smoother. I cleaned the rails and ran a loco over the new work. It ran smoothly, so I went ahead and soldered rail joiners. Again I cleaned the rails and ran a loco. It also ran smoothly. As I have a couple of sections of new (unpainted) track on the Nooksack module, I decided to run some experimental ops over the whole TOMA Phase One (Nooksack, trestle scene, and both staging sections) before breaking out the airbrush for final track painting.

2. First Operations Session

Having unpacked my Alco RS3 #229, I set up a west run of a freight extra from the, as yet unnamed, east staging. Using a switch list to organize the work, I arranged for pick ups and drop offs at the NP interchange, pick ups and drop offs at the trailing point switches in Nooksack, and some cars to continue on to Ferndale (in the west staging.) Using the switch list to list cars to be picked up and dropped off worked well. However, after almost immediately realizing that the Nooksack track had not been used or cleaned recently and that I hadn't cleaned the wheels of the RS3 since before packing it to move in 2021, I took a break to clean wheels and track. I thoroughly enjoyed doing some switching work, guided by just a switch list. I think that the process would work well with a second person, breaking the tasks up between engineer and conductor. 

I did jot down some steps to take to improve the experience, either just running solo or adding another person or two. Either labeled placeholder mockups of the industries or just labels to identify industries or spots in Nooksack are needed. The tape holding the lighted toggle switches in the control panel is not working consistently and needs to be replaced. Finally, make sure that locomotive wheels and all rail are clean before the session! 

#229 turned and ready to make up an east bound extra from the west staging

3. Freight Car Roster Update

While looking through boxes of railroad stuff in search of my locomotives I found the kits and ready to run rolling stock that I intend to add to my roster for the initial TOMA layout. I will have enough freight rolling stock to represent a reasonable mix of kinds of cars, railroads, and regional origin. The thirty-one car total should be more than enough to run, allowing for variety, and the total should allow for appropriate car flow at the proposed industries. 

I haven't really thought about my locomotive, passenger car, or caboose roster at this point. I have several locomotives that need decoder upgrades and all my locos other than #229 need some weathering. Both of those factors are potential gumption traps for me. To move beyond simple switching and just one train I will need to move beyond fear of failure and at least do some simple weathering and attempt a hard wired decoder install! Or not, and focus on structure and scenery work while enjoying some solo switching with what is there now.

Current Freight Car Roster with Railroad highlighted on cars weathered and at standard:


Monday, September 11, 2023

East Staging: Fixing the "Mistake"

Extension ready for track work and wiring

In a post from last month I discussed the possibility of adding an extension to the sceniced staging to provide a siding with run-around capability, stick to a more prototypical plan to GN practice, and create a coved end with the backdrop. After several weeks of indecision, I decided to go ahead and add the extension. Yes, this is temporary staging, but it will have a use through several iterations of TOMA section additions. Making the decision, I committed to working on the railroad pretty much every day, even if it is only for 15 minutes. 

Step One: I drew up a tentative track plan and scale construction plans for the 11 3/4" X 24" open grid benchwork. I made a cut list and cut the pieces and assembled the benchwork with wood glue and 1 1/4" brads using  1" X 3" and 1/2" plywood from stock I had on hand. With the wood shop finally set up out in the garage, it was a fairly easy project with the miter saw and brad nailer ready to go. 
Double checking before assembly on the workbench
Step Two: Using a 2" X 2" leg from my previous railroad as a pedestal, I clamped the extension into place. Experimenting with code 83 track and a Peco switch I had on hand, I laid out and marked the switch location and track center lines. Deciding to use cork roadbed here, I adjusted the height of the benchwork and carefully lag screwed it into place securely attached to the hollow-core door benchwork. I bolted the leg into place, although when I eventually move this staging to another location I will replace it with a narrow pair of legs. 
Benchwork clamped in place and marking the finalized track plan

Step Three: Wanting to experiment with a coved end to the backdrop here, I found an existing piece of hardboard that I had used for a corner of my "U" shaped previous layout. Using the notch cut from the bottom of the backdrop for the corner, I clamped the piece in place and marked where to cut it to create the end. Both that end and the joint with the existing backdrop are held in place by a wooden brace or corner trim screwed into the benchwork frame. 
Fitting the corner backdrop before finalizing the end cut

Step Four: Once the backdrop was in place, screwed into the frame along the back and tucked into the corner brace and trim piece, my next step was to tape and mud the joint and fit the cork. In the photo below, the first coat of mud has been applied and the cork has been cut, glued into place, and tacked down until the glue dries. 
Cork glued down and mudding started

Step Five: as seen in this post's opening photo, I painted the sky and plywood today. While I had the sky blue paint out today, I finished painting the yellow spray foam on the west wall seen unpainted in the previous photo.

Next Steps: I need to prep the switch, solder feeder drops and install the track, extend the DCC bus line, and after wiring and installing the track set up the airbrush and paint the track in order to catch the "fix" up with the rest of this sceniced staging. 

Tuesday, August 29, 2023

TOMA Phase One: Planning for Operations

While I have more involved plans underway for the operations on the larger 4th Subdivision, the first phase of TOMA with the town of Nooksack, an NP interchange, and staging at each end will necessarily have less involved operations.

The initial operations will include just one or possibly two operators with relatively short sessions until I add additional TOMA sections. Early this month, Lance Mindheim explored operations on a small model railroad design that helped me transition from considering the operations for the larger, future 4th Subdivision to focusing on planning the operations of the Nooksack TOMA section.
 

To start with, I will be fine tuning what is essentially a bullet list:

  • Paperwork will be limited to switch lists with set outs and pick ups listed.
  • No car cards, but I will be aware of industry needs when making switch lists
  • All trackwork will be in yard limits, with yard limit rules in effect.
  • Possibility of one scheduled first class train listed on train bulletin.
  • Just one or two trains per session (at least to start.)
  • Use a limited number of cars per session.
  • Use labels for spots and industries until all buildings are finished.
  • Not every industry or spot needs to be used in a session.

Friday, August 11, 2023

East Staging: Fix the Mistake or Live With It?

Mainline and two spur tracks

Following my own advice to double check everything by running trains in my last post, I realized a serious oversight in building the new east staging section while doing so. Designed as a mainline with two spur tracks, I left out the need for a runaround! One option is to live with it, considering that this first phase plan for Nooksack is limited to operating as a switching layout. If I can get my head wrapped around thinking of this as a stand alone, single town railroad instead of sticking to the operations plan for the fully developed 4th Subdivision, the two spurs without a runaround could serve adequately. 

On the other hand, in the big scheme of the operations for the 4th Subdivision, most of the freight switching here will be done by turns. Without a runaround at this end, that will be hard to duplicate. Also, looking at a set of "track charts" for a portion of the Cascade Division that I found online, the Great Northern rarely had just spur tracks without a return to the mainline creating a siding. A  siding that can function as a passing track with a single associated spur would be more typical and hence prototypical. 

East end with mainline and two spurs

While I had thought that the track laying and electrical work was essentially complete, I feel the need to at least explore my options for transitioning the closer spur into a siding. If I also include a tail track long enough for a locomotive as the continuation of the mainline, the siding will function as a runaround. Exploring my options includes looking at what I have on hand, revisiting the construction of the end of this section, and coming up with possible plans for an extension. Including the possibility of coving the backdrop at the end of the section adds an additional "feature" of adding an extension. 

Working through the plans for this possible extension, discussion of my thinking for operations for this first phase as well as my operations plans for the full 4th Subdivision, or basement/train room updates are all possibilities for new posts. I seem to have slipped to just two posts a month from my goal of three for this year. 

Right now though, I need to help my wife troubleshoot how to feed birds without feeding the bear. 


Monday, July 24, 2023

East Staging and Trestle Scene: Berms and Gaps

Berms and gaps along backdrop

Over the last few weeks, I progressed with the terrain along the backdrop and tying the several sections together with the trestle scene module and the new staging section. One successful technique for realism with model railroad backdrops is to hide any ninety degree angles such as where the benchwork and backdrop meet. Creating a berm or slight rise in front of the backdrop can accomplish this. In this post I hope to show how I approached creating these terrain forms. Throughout the process, I had the backdrop protected with wax paper and the track with blue painter's tape

Step One: Create a terrain base or supporting structure for the berm with a slight gap in front of the backdrop. While other techniques exist, I used just a few here:
Crumpled paper held in place with masking tape

Packing styrofoam in "topographic" shapes, stacked and glued in place

Step 2: Cover the form with plaster cloth, a gauze embedded with plaster. I cut the plaster cloth into smaller pieces and briefly wet it by pulling it through water in a narrow paint tray. As I draped the plaster cloth over the forms, I overlapped the sheets and gently smoothed the sheets together. In addition to the berms, I also reformed several hills that had been cut apart to separate the modules for our latest move using the crumpled paper and masking tape technique to connect to the existing cardboard web foundation. 
Plaster cloth repair application and water tray

Step 3: Add a few rock castings. As the plaster cloth dried, I mixed up some hydrocal and cast a few rocks from one of the molds I had on hand. A few days later after all had dried, I glued the rock castings onto and into the plaster cloth. 
Rock castings attached and stained

Step 4: Covering the plaster cloth with Sculptamold or "ground goop." While I have posted about using ground goop before, I decided to go with Sculptamold, an easy to mix, paper mache-like material that I had on hand instead. It spreads with a palette knife, the back of a spoon, or just moistened fingers. 
Sculptamold over the new berm, covering cracks, and
hiding old plaster cloth texture

Step 5: Paint the white Sculptamold areas with my brown "earth" color and remove the protective blue tape and wax paper. 
Terrain painted and ready for next steps

Next steps: With the track uncovered, I want to run some trains to check the track work, electrical, and rolling stock again. Double checking through every step should help towards identifying issues while they are still easy to correct. While I am still in the planning stages for foreground scenery, the newly formed berms are ready for the first layers of ground cover. 


Thursday, July 6, 2023

TOMA Phase One: Developing a Rolling Stock Roster Part 2


In-process spreadsheet: a rolling stock roster

Several weeks ago, I posted about developing a rolling stock roster for Nooksack, the first TOMA section of the 4th Subdivision. There, I came up with a potential number of railroad cars, proportions of railroads represented, and percentage of different car types that I am striving for. Since that post I have adapted an older spreadsheet inventorying my rolling stock by sorting it by kind, adding color codes for the kinds of railroads (e.g., homeroad, connected foreign road, foreign road in region) and updating the standards checked column. I will update the spreadsheet, seen in-process above, as I recheck for meeting standard, complete weathering, or add new cars. 

Revisiting my standards on the workbench

I rechecked standards of some of the rolling stock I already had unpacked and have been running on the Nooksack modules. One of the first posts on this blog discussed my standards as I unpacked from the move from Seattle. My rationale for standards is based on my desire for smooth running, trouble-free coupling, and minimal derailments. Following are my standards and some discussion for each:

  • While at times it can be difficult, I try to follow NMRA Recommended Practice RP20.1 concerning the weight of rolling stock. I use this test track mounted on  plywood and a wooden ruler marked with HO scale recommended weights (1  ounce plus 1/2 ounce per inch of length) and the postal scale. I am not too fussy, but I do try to get close. Boxcars are fairly easy to adjust, but with other styles, it can be a challenge. In another earlier post, I discussed one creative solution for gondolas.
  • Despite some controversy over the choice between metal and plastic wheels, my standards include metal wheels for several reasons. When I started out in a modular group in Seattle, their standards included metal wheels. Metal wheels add weight to often underweight rolling stock. In my perception, they appear to roll smoothly and sound good. Not only do I require metal wheels that turn freely, but I check them for gauge, using an NMRA Standards Gauge.
  • On the test track in the photo, one can notice a Kaydee coupler height gauge and trip pin pliers on the foam along with the NMRA gauge. For smooth operation, I want my couplers to line up and work smoothly, so I check the coupler and trip pin height. I also check that the couplers open and close as well as center smoothly. If I find that I need to replace couplers, I will choose Kaydee #158 HO scale whisker scale metal couplers. I have not yet insisted on replacing all working couplers with these scale couplers, but I could imagine that as a future upgrade. 
  • The trucks need to swivel freely. If possible, I prefer to adjust the truck mounting screws so that one truck rotates smoothly side to side and the other is a bit looser so that it tilts up and down a little as well.  
  • I now consider weathering part of my rolling stock standards. All cars should have some weathering. 
Weathering without the airbrush


Several days ago I tackled weathering two of the three covered hoppers that I will be using for silica sand service. I bought these used last year and had updated the weight; they basically met my standards except they hadn't been weathered. Here are the steps and materials that I utilized:

  • I removed the trucks and started staining the one side of each car with Vallejo 76.517 Model Wash, Dark Grey.
  • While the first side was drying, I removed the wheels from the truck and placed them in my cardboard wheel holder. I washed the wheel fronts down with 70% isopropyl alcohol.
  • While the wheels were drying I stained the other side of the hopper and then the tops.
  • I then painted the wheel faces with MicroLux 29002, Grimy Black using a Microbrush.
  • Returning to the hopper car bodies, I started applying PanPastel 780.5 Raw Umber and 820.7 Neutral Grey Tint along the hatch covers and streaking down the side.
  • I tackled the ends of the hopper cars using both the Dark Grey Model Wash and the Grimy Black
  • One of the Bowser hoppers had a shiny brown original paint that contrasted with the matte weathering, so I sprayed that one with Dull Coat. 
  • While that dried, I started on the trucks, a grey wash and more PanPastels. I had a reference photo of a MOW sand car with grey sand on the trucks. I wanted to approach the look of that, but not quite as extreme.
Today, I went through and unpacked many of the cars from Meadville that were on the original inventory spreadsheet that this roster is based on. I also pulled out a couple of kits or RTR cars that will be needed to complete this roster. I have some hopper cars for the rock train that I haven't found yet that I think will wrap up the list. At this point my task is to check more cars for standard, weather a few of them, and build a few kits that I have on hand. I may post with building and weathering the two GN flatcars. If not, I probably won't post about the roster again until it is complete. Lots to do with scenery though!

Sunday, June 25, 2023

East Staging: First Structure, a tool shed


In working on the east staging, I decided that I wanted to build a couple of small structures that would be appropriate for a small yard. The first one that I tackled was an ITLA toolshed. This seemed like a good start since I am out of practice with building wood structures, and I want to improve my modeling skills. I have also started some terrain work, but I would like to have the structures on hand to finalize the placement of roads, paths, and simple foundations. As I am hoping to consider composition in creating the scene, having the actual buildings will be helpful. 

After reading the instructions and checking that all the parts were there, I decided on a paint scheme. While depots and public buildings would have been in GN's two-toned grey scheme or the new white and green scheme in the 1950s, buildings such as this tool shed were painted in a "Mineral Red." Early depots had a dark green (almost black) trim with the Mineral Red body color. I have a photo of a shed painted in that scheme that I took in Puyallup, Washington. I made the decision to go with that scheme rather than all Mineral Red. 

I mixed Vallejo Model Color 70.908 Carmine Red with 70.994 Dark Grey for the Mineral Red. I found the mix too light and bright on this first coat, so added more of the Dark Grey on the second coat. For the trim, I mixed Vallejo 70.894 Camouflage Olive Green with the same 70.994 Dark Grey. As seen in the photo, I painted the trim still in the carrier sheet and the walls before assembly.

While for the most part I followed the instructions provided in the kit, I did make a couple of changes. I decided to add bracing to the kit, carefully planning where to add 1/8" square strip wood to further support the tab joints of the kit. I also switched from using a canopy glue to using Titebond 2 yellow wood glue, after seeing how the canopy glue dried glossy and was hard to remove if it oozed out. After the bracing dried I painted the inside of the walls with a light grey craft paint. After that dried I glued the walls together and to the floor, bracing with a pair of small angle squares as seen in the photo. In the last wood structure kit I attempted, several corners were noticeably out of square in close-up photos.  Careful bracing with angle squares or the Micro-Mark magnetic glueing jig (tools that I have on hand) should be mandatory when building future structures. 

After the walls were glued together and dry, it was time to work on the doors, windows, and trim. Another change from the instructions came about as I struggled with the windows. As best as I could tell, the supplied clear plastic was intended to fit into the window openings in the walls. I could fit the window sash in after careful sanding, but the window "glass" did not cooperate. So, I followed the directions for the sash and trim, but chose to cut oversize clear plastic from my plastic sheet collection and glued it inside the wall. As I worked to complete the walls, I touched up the interior and trim pieces with a second coat of paint. 


Walls, windows, and trim complete;
clamp and glue the roof beam.

Spread a thin layer of wood glue on the walls and beam,
position the laser cut shingle panels, and clamp with a rubber band.

Before installing barge boards, weather the shingles 
and along the bottom with "Oiled Earth."

Learning Points:

  • Consider both aesthetics and realism for paint schemes; consult resources such as photos and GN "Reference Sheets."
  • With wood construction, brace and paint/stain all sides to prevent warping.
  • Find a glue from all the appropriate options that you are comfortable with, in my case wood glue.
  • Utilyze jigs and clamps to insure secure and correct glued joints.
  • The ITLA kit was high quality; I would use their materials again. I really liked their shake roof!


Saturday, June 17, 2023

TOMA Phase One: Developing a Rolling Stock Roster


Earlier this spring I attended several of the online NERX clinics, including one by Drew James on developing a realistic or plausible rolling stock roster. In developing my initial rolling stock roster for this first TOMA section, Nooksack and a sceniced staging module, I am using notes from his clinic, some information from a Great Northern 1955 Annual Report that I found online, and some of my planned industries for the 4th Subdivision. This roster is focusing on freight cars; passenger and engine rosters are a different topic.

Percentage of Railroads Represented

Drew James, in his clinic, suggests considering the era, the setting, and the type of railroad. In my case this is 1954, Whatcom County in Washington State, and a branchline of the Great Northern Railway connecting with the mainline in Ferndale and interchanging with the Northern Pacific. I described this in a recently posted rationale. He then goes on to suggest developing a target percentage of the railroads represented in the roster and ultimately creating a spreadsheet of cars. Keeping in mind that this is the percentage of different railroads, not kinds of cars, at this point, here is his suggestion for target percentage:

  • Home Road: 50%
  • Connecting Foreign Road: 25%
  • Foreign in Region: 13% (This would include such roads as Milw, UP, CN, SP&S, etc.)
  • Foreign Outside Region: 6%
  • Private: 6%
If I pick a total amount of around thirty cars for this first iteration of the 4th Subdivision, his target percentage of rolling stock would work out like this:
  • 15 Great Northern cars
  • 8 Northern Pacific cars
  • 4 foreign in region 
  • 2 foreign outside region
  • 2 private

Percentage or Number of Different Car Types


I have guidelines for the number of cars from different railroads, but what about the numbers of different types of rolling stock? Just a few days ago, I found a Great Northern annual report online from 1955 that included information about the amount of freight revenue by different commodity groups in 1954. While this may not reflect my branchline, it does give an overview of traffic pattern (and hence types of rolling stock) for the Great Northern in general. Here are some percentages and notes theorizing about variance based on location in the Pacific Northwest:
  • Forest Products: 15% (a lot from the PNW, so percentage may well be higher)
  • Agriculture: 31% (almost 2/3 of that grain)
  • Manufacturing and Misc.: 31%
  • Mines: 18% (Most was iron ore, 25% of that is other)
  • Animal and Petroleum: around 2% each
The freight traffic along the 4th Subdivision is much more likely to be impacted by the types of industries present than the traffic patterns of the railroad as a whole. So, an inventory of industries and likely traffic should also be considered. 
  • Nooksack:
    • Cannery: boxcars, refers, tank cars 
    • Fuel Dealer: tank cars
    • Grocery Warehouse: refers, boxcars
    • Team Track: gondolas, flatcars, boxcars
  • NP Interchange:
    • Limestone: hoppers
    • Miscellaneous: boxcars, refers, all kinds
  • Farther East:
    • Silica Sand: covered hoppers
    • Copper Ore: ore car
    • Lumber: flatcars, gondolas, boxcars
Using the same 31 total cars I built an initial breakdown of car types. In addition to the general and specific commodities and industries considered I was also influenced by a chart of "railroad cars in service" from 1955 in Jeff Wilson's Freight Cars of the '40s and '50s in coming up with a first draft of target numbers for different types of cars: 
  • Boxcars: 12
  • Hoppers: 3
  • Tank Cars: 3
  • Refers: 3
  • Flatcars: 2 
  • Gondolas: 4
  • Covered Hopper: 3
  • Ore Car: 1 

A New Spreadsheet and Other Considerations


With my rolling stock having gone through a second move and with these target numbers in mind, I plan to create a new Excel document for this first phase based on Nooksack. I have a spreadsheet of rolling stock that I created in Meadville for the first version of the 4th Subdivision. I hope to become more familiar with sorting functions in Excel, so that I can design this new spreadsheet with railroads represented and car types easily sorted. Even without new Excel skills, I can always resort to analog techniques with color pencils. 

Revisiting my standards may well be another consideration as I develop, review my existing collection, or add to my rolling stock roster. A much earlier post describes my existing standards, and another post explores combining mechanical standards with weathering. I haven't yet written about or fully determined what standards I might develop for level of modeling detail for this new version of the railroad. In developing this new roster, I am striving for a level of plausibility and realism based on overall impressions and assumptions rather than researching and recreating actual car lists from September 1954. (Although a first step in this direction might be obtaining a 1954 edition of the Official Railway Equipment Register.) At this point though, near flawless running and overall impression of realism take higher priority than insisting on contest level rolling stock. On the other hand, I have nothing against improving my modeling ability or raising my expectations moving forward. 

Wednesday, June 7, 2023

East Staging, a Switch to Modeling

Interbay Yard, Seattle 1960 Cornell University Library
"U.S. President's Railroad Commission Photographs Collection"
While the east staging still continues as my initial focus area, I find that I am transitioning from what I think of as layout building to, more directly, modeling. More and more I find having prototype photos useful. I have printed out both the opening photo (believed to be in the public domain) and one of the SP yard in Eugene, Oregon from Tony Thompson's post: Open-car Loads: Forest Products. These photos are inspirational for several kinds of modeling, providing inspiration for both scenery and rolling stock and to some extent even structures. 

Scenery starts with terrain. With my interest in backdrops and hiding the transition between them and the benchwork, I started with a berm along the back. I covered the track with blue painter's tape and the painted backdrop with waxed paper. Then I formed a berm or slight rise with paper and masking tape before then applying plaster gauze. I have more plaster gauze on order as a joint between the Nooksack modules hidden by a now collapsed hill will need to be repaired, and I used up what little gauze I had on hand. The next step will be to apply some Sculptamold, and perhaps create some small plaster rocks.  I think I will carve some drainage into the foam along the mainline in the front. Referring back to the two photos, the yard area can be quite flat, but a subtle ditch and very slight rise between the mainline and the spurs would kill the pool table look. I should at least start thinking about vegetation; the photos suggest a variety of static grass and small shrubbery. Somewhere along the backdrop I will place some fir trees. I have read about or watched videos of two conifer modeling techniques that I want to try.

Before I get too carried away with planning the terrain (such as, will there be a road or just paths?) I need to think about structures. I ordered a yard office from GCLaser and a tool shed from ITLA, both kit companies whose products I have not worked with before. I also am considering a third small building, a telephone booth/car-knocker shed. I have several six-over-six window and a door casting that would be appropriate if I decide to scratchbuild that one. I started the tool shed by consulting the GN Railway Historical Society's Reference Sheet No. 402: Standard Exterior Colors of GN Frame Structures and Depots to come up with a reasonable color scheme. One more modeling session should finish the tool shed; its construction may be my next post. 

Another possibility is to review my standards for rolling stock and to consider what my initial rolling stock roster will look like. Tony Thompson's lumber load post referenced above really got me thinking about another modeling project, adding a couple of flatcars to the roster. Whether modeling structures, scenery, trees, or rolling stock I have plenty of modeling projects to get me back to the workbench and back in practice. 


Monday, May 22, 2023

Nooksack: East Staging Part 4


In the post from March 25th, I described a punch list of next steps. Many of them are now complete. One can see several under way in the opening photo. The temporary staging module is bolted in place, as are the legs. A four foot fluorescent fixture has had both tubes replaced with LED tubes, hung over the new staging module, and plugged into the switched power strip along with the other layout lighting. Also, I installed one of the older backdrop panels here on the the east staging. After touching up the sky, it fits in although it will not be the permanent backdrop. While this section will be my focus for a while, I need to remember that while it will be sceniced, it will not be permanent. As I plan scenery here, I need to keep in mind that the staging will move to other locations, likely having what is now the front of the module, later be the back. 

In this photo, the Northern Pacific interchange track in the back and the connection between the staging and permanent module have been installed. In both cases I decided to use a few track nails rather than soldering the rail joiners to make a smooth transition. Later it will be easier to disconnect the staging track and any expansion and contraction will have room. On the interchange track, I just used a few dabs of white glue to hold the track in place until it is ballasted as it will most likely be removed when the staging module is moved. The mainline track connector is held in place with adhesive caulk on the end near the turnout while the end near the permanent module is loose. Feeders are already in place on both sides of this unsoldered rail joint connection, and the track nails are holding the joint securely and smoothly without the kink seen before.

Over the last few days I have replaced any missing ties, prepared the track for painting, airbrushed the track, and then hand painted the ties.

Removing tie plates and spikes: working carefully,
always cutting away from my fingers holding the ties


Scrubbing the soldered joints to remove any flux residue

Painting with 1/3 each: rail brown, tie brown, and thinner

Hand painting with airbrushed color and 
light grey craft paint; not as tedious as it looks!

At this point the staging is ready to be sceniced. I have found a couple of prototype photos that provide inspiration and suggestions for details to include. I attended a clinic at the Rails to Pittsburgh convention several weeks ago that also provided some inspiration. I suspect that exploring the inspiration and the first steps that I take will be my next post. 
 

Friday, May 19, 2023

3 Weeks, Really? and Rationale Reviewed

It has been over three weeks since my last post, a big gap considering my goal of three posts a month that I set for this year. Model railroading didn't stop during that time. I traveled to Pittsburgh for four days for the MCR 2023 convention: Rails to Pittsburgh, an enjoyable experience on several levels. I tackled many of the "next steps" I listed for working on the new east staging module. Perhaps not as successfully, I attempted several approaches to "an organizational framework for my big picture next steps" mentioned in my last post. I tried brainstorming some SMART goal ideas as one approach. I also researched a graphic organizer, in this case a "concept map." I spent some time with both of these approaches reviewing and/or learning about them and coming up with a draft for each. Since neither really accomplished what I was hoping for (a richer, more concise, and perhaps visual overview) I won't spend more time here beyond noting that I provided a link to an overview for each. I did end up updating my initial rationale for the 4th Subdivision which I will include below. 

Mt. Baker from highway approaching Ferndale, Washington

Rationale

The 4th Subdivision of the Cascade Division of the Great Northern Railway is set in Whatcom County of Washington State in September of 1954. The branch line travels approximately thirty-five miles through a mix of prototype and freelanced locations from the Strait of Georgia north of Bellingham into the Cascade Mountains. While based somewhat on the actual 3rd Subdivision that traveled from Anacortes to Rockport in Skagit County, the 4th Subdivision is my creation. Running east from the fictional harbor town of Port Gulick, it incorporates part of what was the Bellingham and Northern Railroad (in real life, it became a landlocked branch of the Milwaukee Road) and interchanges with the real GN mainline near Ferndale and the real Northern Pacific line near Nooksack or Everson, crossing branches of the Nooksack River several times. Around the midpoint of the line it transitions from farmland and forest into more rugged foothills of the Cascades. Two fictional towns, Chikamin (Chinook for metal) and Greenrock, still have more than just a legacy of mining and logging in the early 1950s. While the Birch Bay & Cascades logging lines still bring out logs and have trackage rights over thee 4th Subdivision, the copper vein near Greenrock is just about played out, but a major silica sand source is still very active there. 

In designing the 4th Subdivision I tried to build on an awareness of my interests and goals. Coming to model railroading with an interest in history and art, I hope to capture the atmosphere, mood, and theme of that time and place by approaching the 4th Subdivision as a three dimensional painting. I also have an interest in the model railroad having some operational flexibility, whether taking a "fun for one" approach or having the potential of holding a small  operating session for a small group as a possibility. 

In building the 4th Subdivision I am taking the TOMA, or one section at a time approach, starting with the town of Nooksack, a connected scenery module, and temporary staging on either end. The Nooksack modules are ones that I started in Meadville and moved while one of the staging sections is a completely new module. With TOMA, one builds a section to completion including scenery, structures, rolling stock, and operations before moving on to additional sections. 

Moving past this need for an overview, I am likely to explore the steps I have already taken to complete the new east staging in an upcoming post. Another likely post will explore an approach to completing a scene presented in a clinic that I attended in Pittsburgh and how I might use it on the new module. 


Tuesday, April 25, 2023

Nooksack: East Staging Part 3

Mainline connection to East Staging module
Today, I ran a train into and out of the east staging using both turnouts and all three tracks. It all worked smoothly. However, at the joint where the new staging module meets the Nooksack modules seen in the photo above, a slight wobble appeared as some rolling stock went through. Nothing derailed, but my goal is to have the best trackwork possible. Now that the new module is bolted in place, I need to remove the slight kink and even the rail height. One option is to solder the rail joiners, and another is to spike the two sections of track into alignment without soldering the joiners.  

Next Steps to Complete East Staging

  • Fix mainline connection discussed above
  • Legs bolted and painted
  • Continue running locomotives/trains to double-check trackwork and electrical
  • Don't forget the NP interchange track!
  • Clean solder and install missing ties (Nooksack too!)
  • Install backdrop
  • Paint rails and ties (Nooksack too!)
  • Light over staging module
  • Fascia and UTP install
  • More basement organization

Transition to "Big Picture" Next Steps

I am not quite sure how I am going to approach this, but I feel the need to clarify my plans for the Nooksack one-town TOMA. With TOMA the goal is to bring this section to completion with scenery and operations not just under way, but finalized before moving on to the next module or section. I am leaning towards revisiting my goals and interests, perhaps creating what Iain Rice called a rationale or others have called a vision statement as well as creating a draft graphic organizer tying all the interrelated parts together: History and Art with model railroad topics of operations, industries, rolling stock, structures, and scenery. All these topics are part of the Big Picture next steps, but I need an organizational framework as a starting point.